3 Tips to Tackler Dripping Paint Like a Pro!
Paint drips are a typical problem when painting a woodworking project, cabinets, or wood trim, and they’re especially aggravating when they dry before you see them. Paint drips are often created when you used an overloaded paintbrush to paint object in a single application. The extra paint runs due to gravity, and when it dries, it congeals into noticeable drips. The good news is that paint drips can be fixed even after they’ve dried, and it’s even easier if you detect them while they’re still wet. Below are 3 things that we will do as professional house painters in Melbourne when facing paint drips.
When the Paint is Still Wet
If you catch the dripping paint when it’s still wet, you can usually just brush it out with a brush. The key is to have the brush strokes go in the same direction as the rest of the painting. Brushing in the other direction to stop the drip will generally result in unpleasant cross-strokes that are difficult to erase. Try a few brush strokes and observe what happens: if the paint feels sticky or has no impact on the drop, stop brushing—the paint is already too dry, and any more brushing will just exacerbate the problem.
If the Paint Has Dried
It’s often preferable to wait for a paint drip (and the surrounding area) to dry fully before attempting to fix it. It’s crucial to let the paint dry fully before handling the drip; if you try to scrape or sand it while it’s still wet, the paint will peel up.
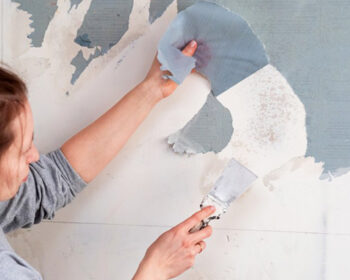
The shininess of the paint highlights a raised region created by a paint drop. As a result, the initial step is to sand or cut down the elevated region. Begin by using a clean scraper, razor blade, or 5-in-1 tool to softly scrape down the drop. It’s best if you can keep the surrounding environment as quiet as possible.
After you’ve eliminated the elevated section of the drip, use 220-grit sandpaper to sand away the remaining flaw. Sand just in the direction of the drip; sanding back and forth in the other direction causes the paint to gum up or flake away, creating a larger defect. Sand only the drop itself, leaving the surrounding paint alone. Apply another coating or two of paint after you’re sure that the drip has been completely flattened. The imperfection should be hardly visible once the paint has dried.
For More Extreme Case
If you’ve scraped and sanded and there’s a hollow area where the drop was, or if your repair attempts have caused any additional damage, you may cover it with glazing putty, such as Bondo. With a putty knife, spread the putty over the wall, then scrape off the excess with a tiny drywall knife. Allow the putty to cure before sanding as instructed. To avoid issues with the topcoat, prepare the puttied area first; paint that is applied immediately over putty can occasionally develop pinholes. To disguise the repair area, add another coat or two of topcoat paint after priming.


